Dictation
Retrieve and upload
Retrieve and Upload feature allows you to upload voice files using digital voice recorder (DVR).
Click Dictation menu, the Dictation page open.

Connect the DVR to the computer, the
 button will be enabled like this.
Click on
button.This will open Retrieve and Upload window.
Select care provider name from the Care Provider drop down list.
Select the location name from the location drop down list.
Choose backup dictation yes or No, if yes select days the voice file to be retained on your local machine and click on OK button. By defaullt
 wll be selected as
 No.
Note
Backup of uploaded dictations will not be saved on your computer if you choose Save backup dictations locally as No.
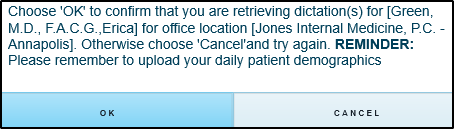
Click
 button to upload voice files.
Confirmation message will be displayed like below, click on
button on the confirmation message.
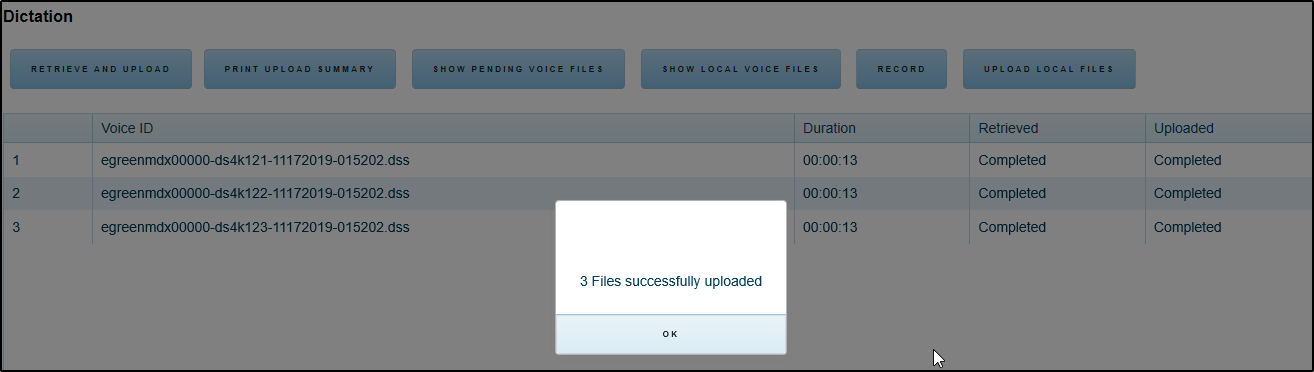
After uploading dictations successfully. The successful message will display as below,
Note
Retrieve and Upload feature supports DSS, DS2 and Mp3 recorders.
Upload Files
Upload Files feature allows user to upload voice files by browsing voice file folder from the user’s machine. User can browse and select voice file stored in any of the drive folders including external/USB drives and upload voice files for transcription.
Here are the steps to upload files from the local folder,
Click Dictation menu.
Click UPLOAD FILES button.
This will open “Upload” window.
Select
care providername from the drop down list.Select
location namefrom the drop down list.Choose backup dictation yes or No, if yes select days the voice file to be retained on your local machine and click on OK button. By defaullt
wll be selected as No.
Note
Backup of uploaded dictations will not be saved on your computer if you choose Save backup dictations locally as No.
Click OK button.
Confirmation message will be displayed like below, click OK button on that.
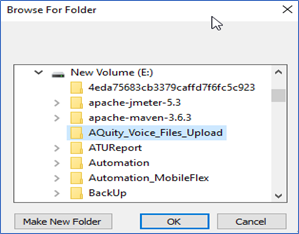
Post clicking OK on the confirmation message, browse and select the folder where voice files are available and click on OK button. All the voice files present inside the selected folder will be uploaded to AQuity for transcription.
After uploading dictations successfully. The successful message will be displayed like below,
Note
Upload Files feature supports DSS, DS2, Mp3, WAV, WMA, MP4 and AAC voice file types
Print Upload Summary
Print upload summary allows you to print summary of uploaded dictations.
Note
The print upload summary button will be enabled only after dictations upload.
Show local voice files
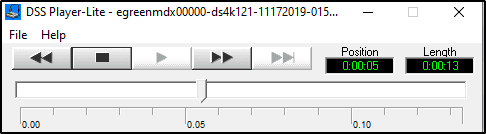
Show local voices lists the local voice files available on your computer. Here you have option to play local voice files.
Click Dictation menu.
Click
 button.
Select a file and click Play button.
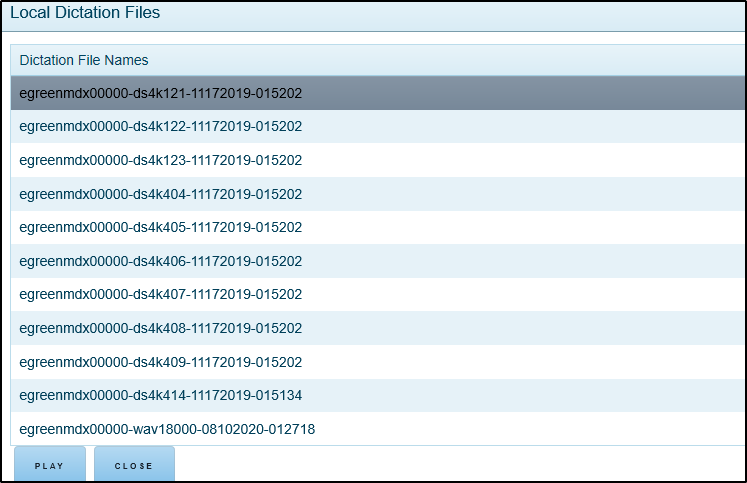
The selected voice file will play in the default player configured.
Show pending voice files
Clicking on Show pending voice files button will redirect you to the transcription pending voice files list.
Record Dictation
Here user can record the dictations using microphone on your computer/laptop. Following are the steps to record voice files.
Click Dictation menu.
Click
 button.
Record window opens like below,
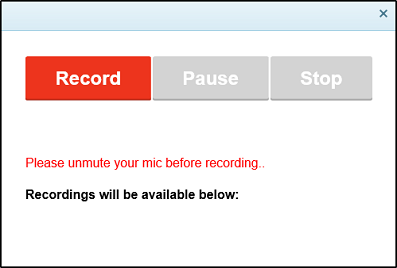
Click
Recordbutton to record voice files.Click
Yesbutton, when browser asks permission to use your microphone.

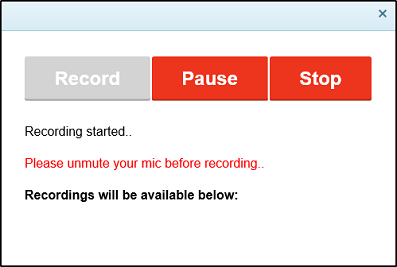
As soon as the recording started, the Record button will be disabled and Pause and Stop button will be enabled.
You can pause recording by clicking on
Pausebutton. ThePausebutton will change toResume.
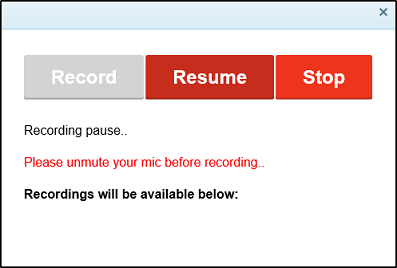
To resume recording click
Resumebutton. TheResumebutton will change toPause.To stop recording click
Stopbutton. TheRecordwindow will be displayed like below,
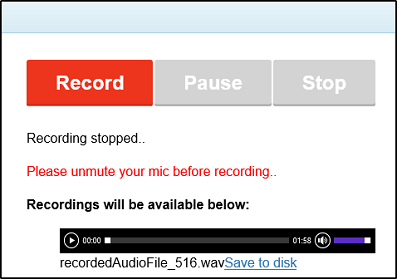
Click on
 to play the recorded voice file.
Click
Save to disklink to save the recorded voice files to user’s computer.