Documents
This screen allows you to manage all your transcribed reports. Here you can open, edit, print, eSign and search your transcribed reports.
Open document
Following are the steps to open a transcribed document.
Select a document from the documents page.
Right click on the selected document.
Select the Open option from the pop up.
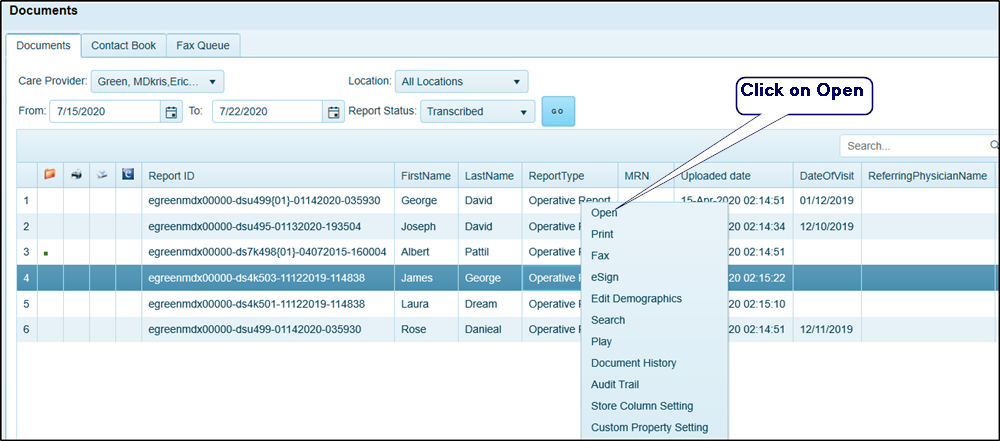
- Or You can also
opendocument by selecting the document and clicking onbutton.
The selected document will open in the Microsoft Word. After closing the document,
 will highlight in the
  column for the selected document.
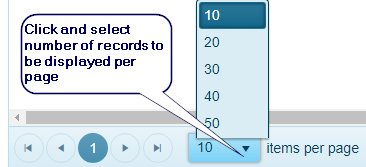
Pagination
You can choose number of records to be displayed on the documents page. We have provided pagination option in which you can select maximum 50 records to be dispayed per page. By default application will display 10 records per page.
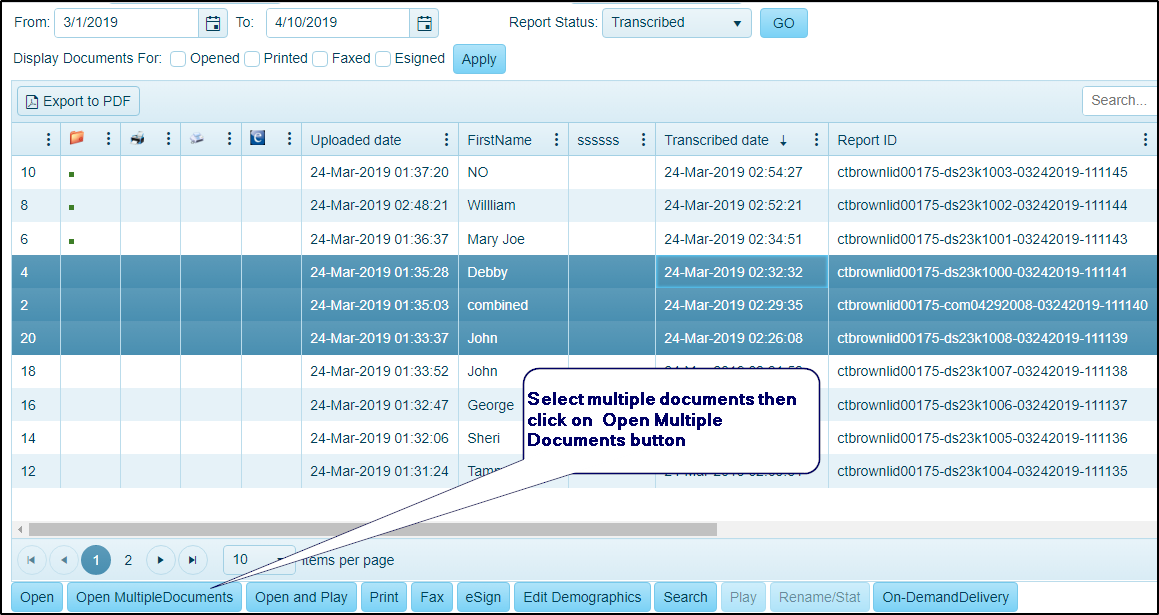
Open Multiple documents
This feature allows you to open multiple documents at the same time.
Select multiple documents from the documents page.
Click on Multiple Documents button.
All selected documents will be opened at the same time.
Note
Selecting multiple documents and clicking on Open button will open single document at a time. As soon as first document close the next document opens automatically.
Edit document
Select a document from the documents page.
Right click on the selected document.
Select the Open option from the pop up
- Or You can
Openthe document by selecting the document and clicking on
The selected document will open in the Microsoft Word.
Edit the document content, click on Save button and close the document.
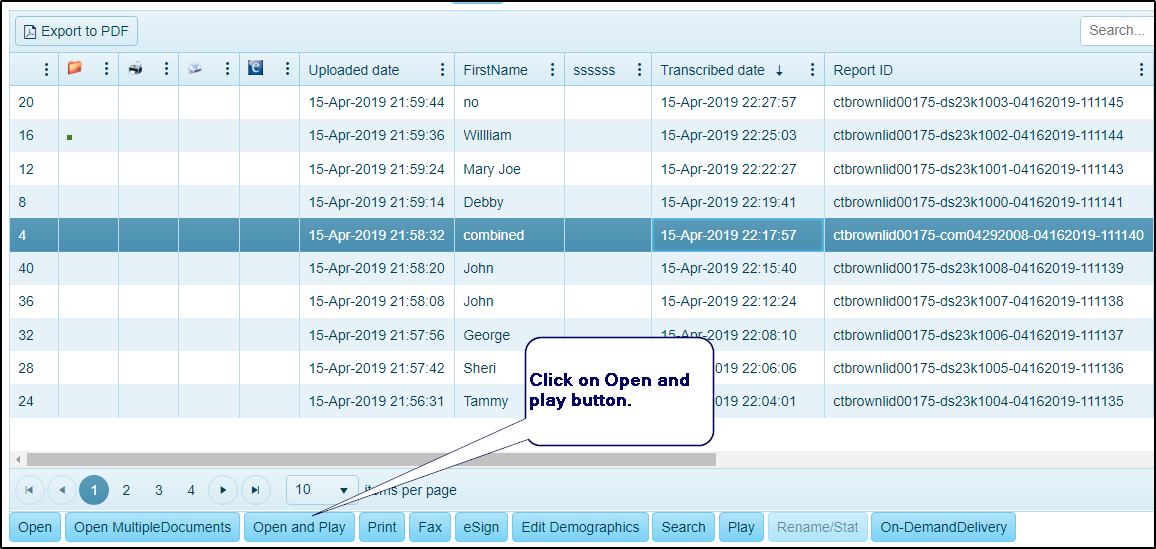
Open and Play
Open and Play feature opens selected transcribed document and have the voice file played in the background. You can listen the voice file along with the document review.
Select a document from the documents page.
Click on Open and Play button.
The selected document will open in MS word and the voice file start playing in the background.
Esign document
Select a document from the documents page.
Right click on the selected document.
Select Esign option from the pop up.
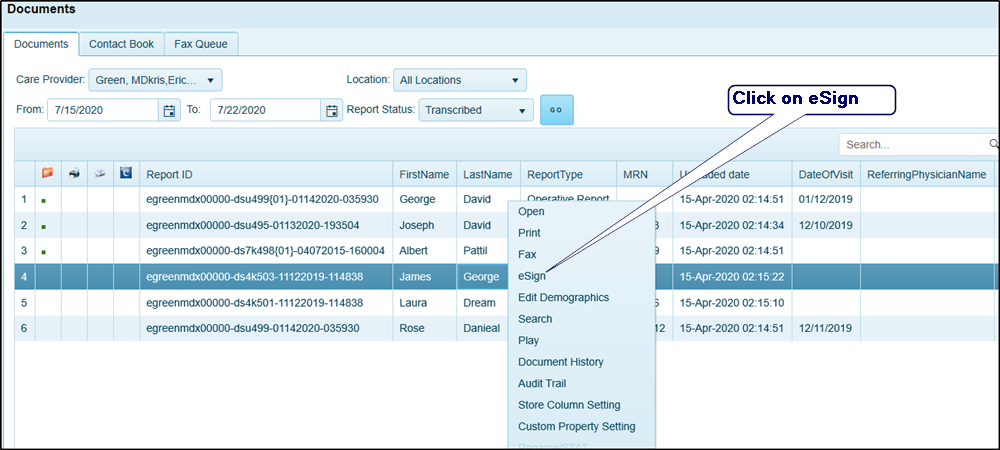
- Or You can select a document and click on
button.
- The selected document will be eSigned. After the eSign, will be highlighted on the
 column to identify the document is esigned.
- The selected document will be eSigned. After the eSign,
Dual eSign
Dual esign feature allows multiple physicans to eSign on the same transcribed document.
Edit Demographics
Select the document the demographics details to be edited from the documents page.
Right click on the selected document.
Select Edit Demographics option from the pop up.
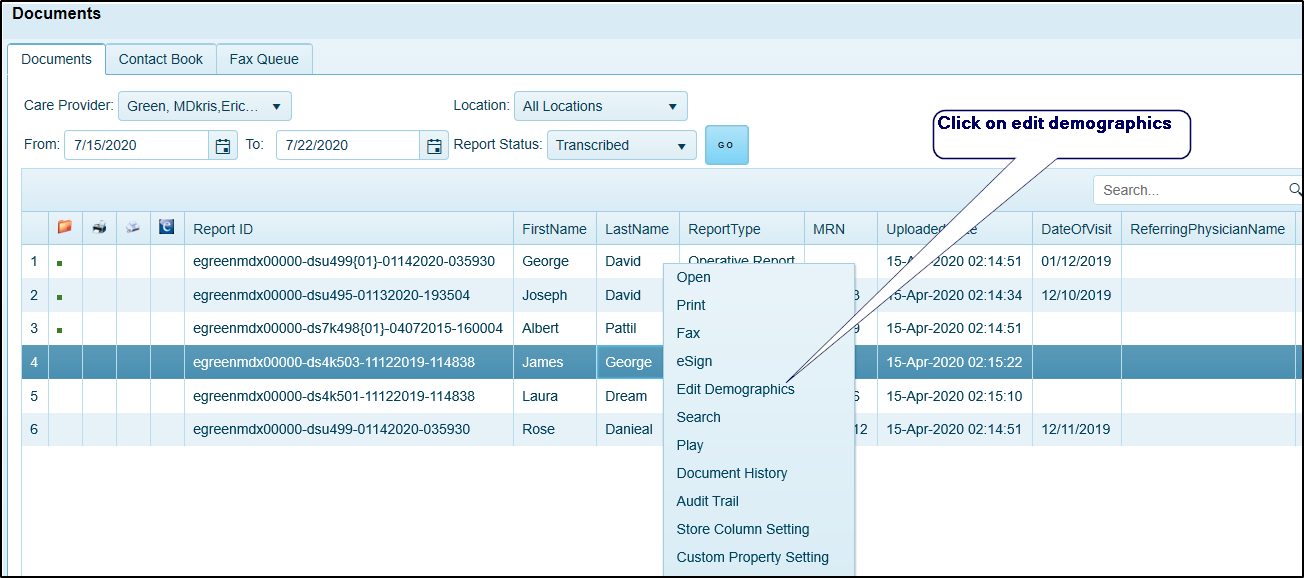
- Or Select the document and click on
button.
Edit demographics window will be displayed like below.
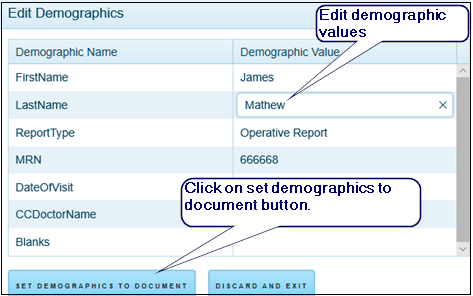
Edit demographic details and click on
Set Demographics to Documentbutton.The edited demographics details will be updated and displayed in the corresponding columns on the documents page.
Print documents
Select the document to be printed from the documents page.
Right click on the selected document.
Select Print option from the pop up.
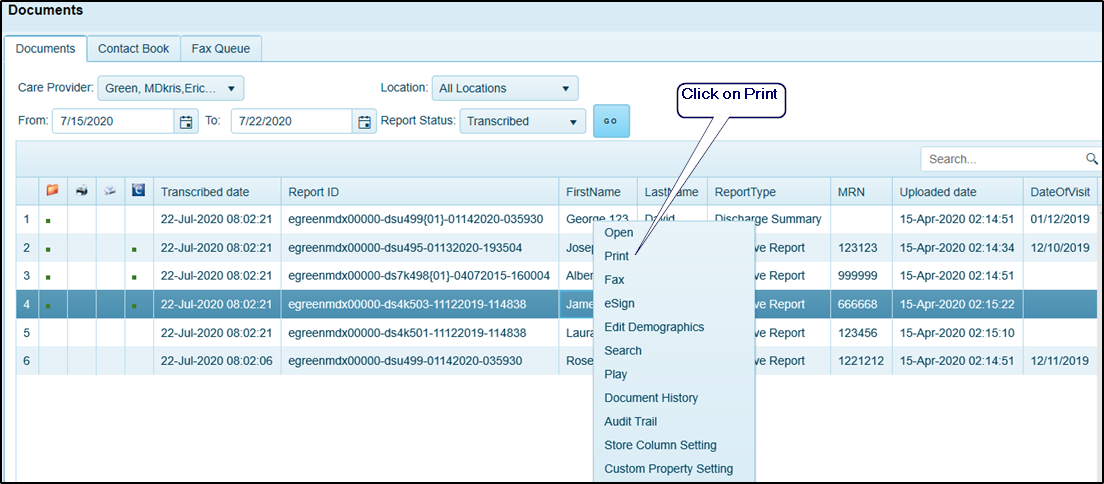
- Or You can select the document and click on
button.
- The selected document will be printed based on your printer configuration, the will be highlighted in the
 column for the selected document on the documment page.
- The selected document will be printed based on your printer configuration, the
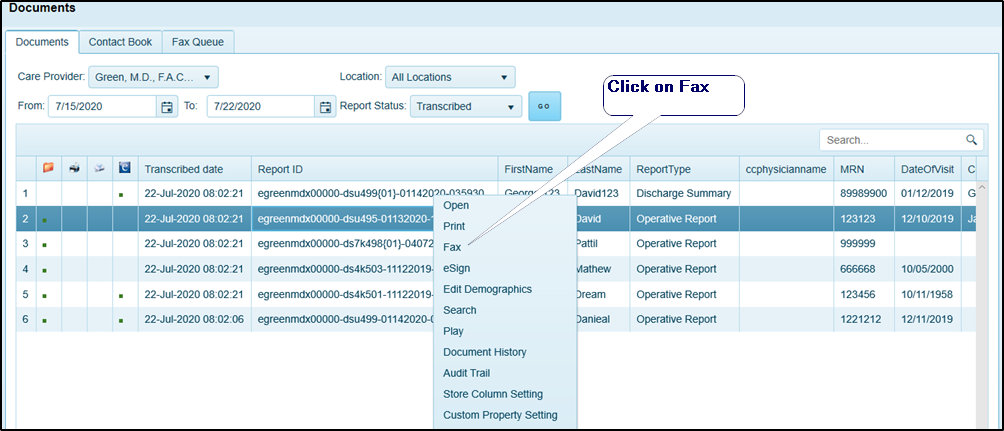
Fax
Select the documents to be faxed from the documents page.
Right click on the selected document.
Select Fax option from the right click pop up.
The following fax window will open to the user.
- Or Select the documents and click on
button.
- The Fax window will be opened. Select fax recipient using the
Search Forfeature. Following options are available for recipient search, Recipient First Name
Recipient Last Name
Fax Number
- The Fax window will be opened. Select fax recipient using the
In this example, the selected search criteria is Recipient Last Name and as soon as user type few letters of the recipient last name, the matching contacts details are filtered and displayed below on the table.
Select the contacts and click on
 button.

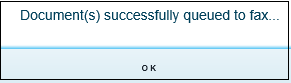
The following confirmation message will be displayed. Click on OK button.
The queued fax details can be viewed from the Fax Queue tab

Add new fax contact
To add a new fax contact,
Click Contact Book from the documents page.
Click Add button on the Contact Book tab.
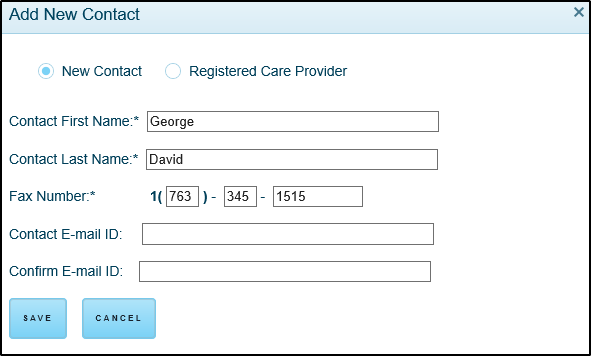
The Add New Contact window will open to the user.
- Here user has two options,
New Contact
Registered Care Provider
To add new contact select New Contact, fill the details and click on Save button.
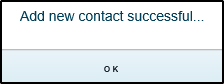
A success message will be displayed like below.
To add a new fax contact for the Registered Care Provider follow the below steps,
Select Registered Care Provider option from Add New Contact window .
Select care provider name from the drop down list, fill fax number and click on Save button.
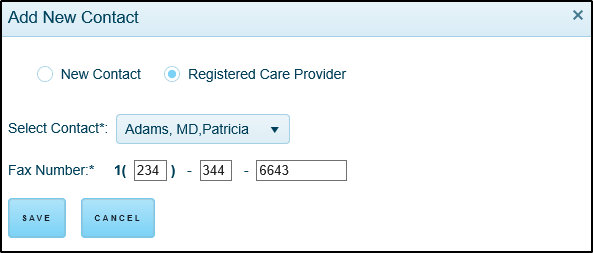
A new fax contact will be added for the registered care provider, the success message will be displayed like below.
Note
You can add bulk contacts using the Import feature.
Quick Search Contact
You can quickly search fax contacts using quick Search option provided on the top right corner of the contact book. The quick search text field is highlighted in yellow color below,
Click Contact Book from the documents page
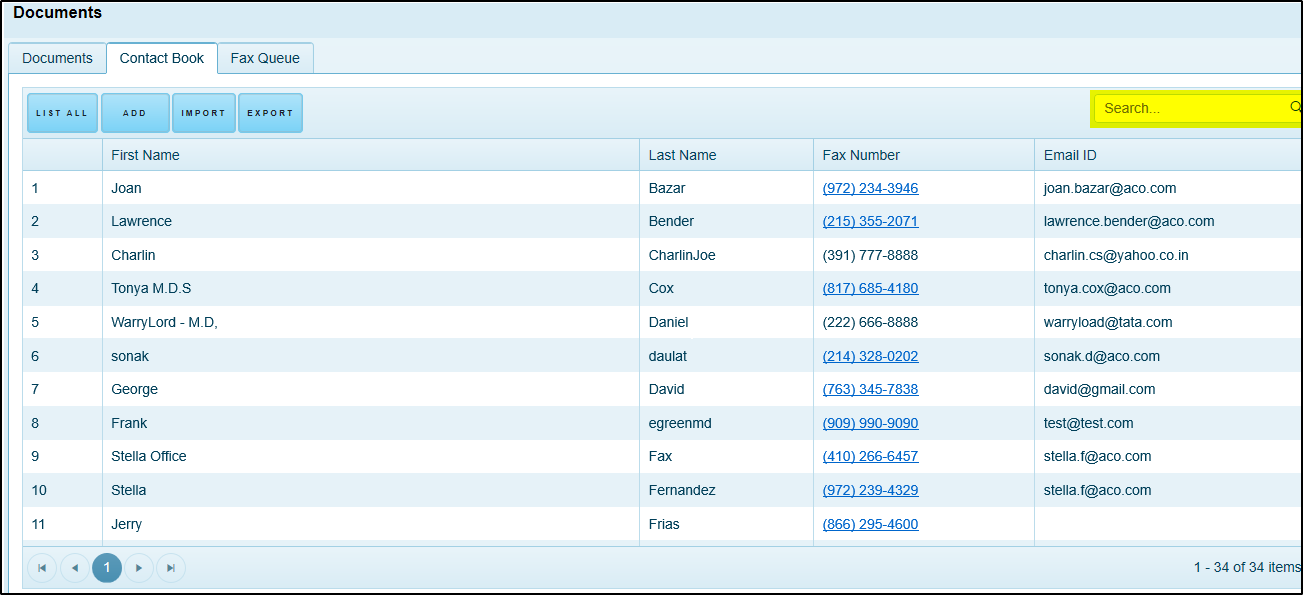
Enter few characters of first name, last name, fax number or email id in the search field.
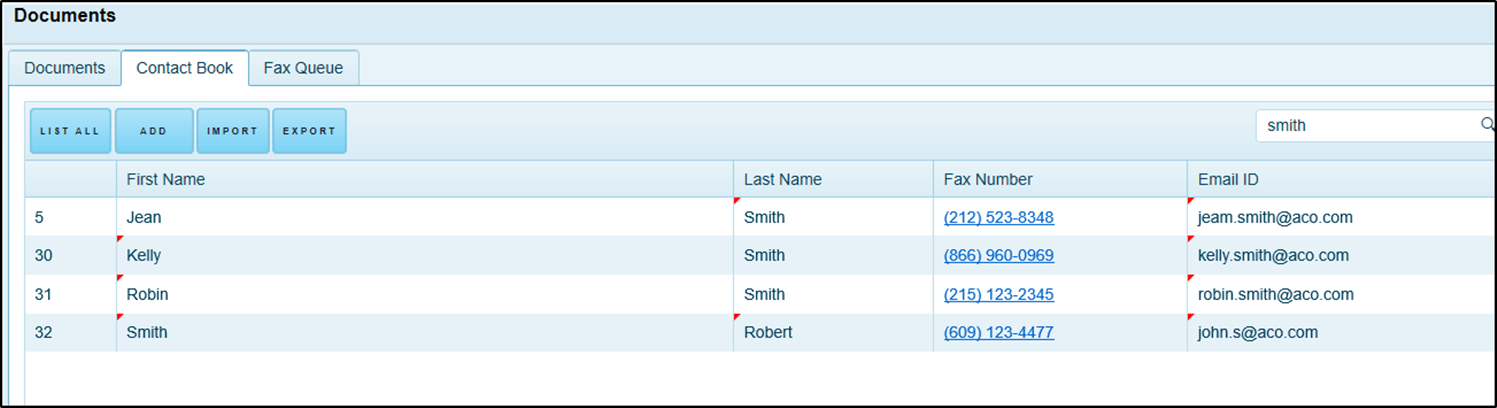
Based on the entered search criteria, the matching records are filtered and displayed.
Note
All the columns in the contact book are considered for the search.
Edit fax contact
You are allowed to edit contact book details.
Click on the value to be edited from the contact book, in the below example user is trying to edit
Fax Number

Edit the fax number and click anywhere outside the text field.
Confirmation message will be displayed like below.
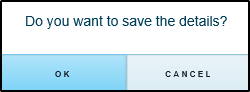
Click on OK button to save the changes. Click on Cancel button to cancel the changes.
Delete Contact
Select contact to be deleted from the contact book.
Right click, and select
 from the pop up.
Confirmation message will display as below.
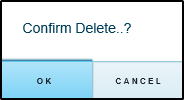
Click OK button to delete the selected contact. Click Cancel button to cancel delete.